


This is a step-by-step guide for purchasing a domain name from Porkbun and using it for your Vercel hosted project(s). Before we get started, it's necessary to understand what both platforms are and what they're used for.
Vercel is a cloud platform for deploying frontend applications, according to the Vercel official website. it is primarily used to host your frontend projects.
Porkbun is a phenomenally excellent Pacific Northwest-based ICANN-accredited domain name registrar, according to the company's official website. It is a website where you can buy your domain name, and it is unquestionably among the most affordable domain name sellers in the industry.
Please keep in mind that I won't be showing you how to host your application on Vercel because I presume you already know how to do it.
Step 1 - The first step is to sign up on porkbun if you do not have an account. This is a pretty straight forward step, as all you'll need to do is enter your email, username, a password and confirm the password. If you already have a password, then sign into your account.

Step 2 - You can put your custom domain name in the search bar on the homepage after signing up and logging in to see whether it is available.

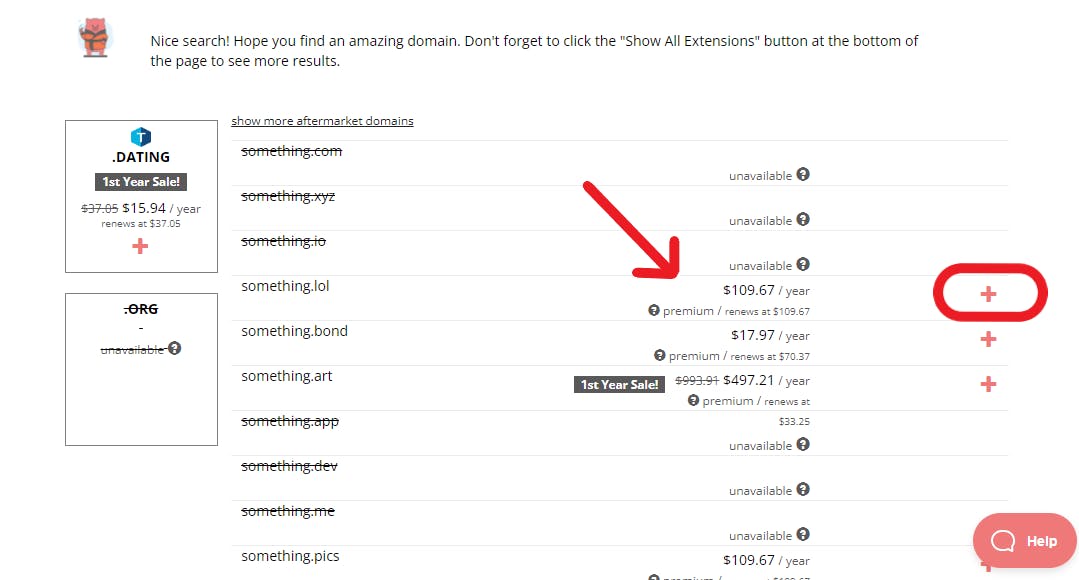
Step 3 - If and when you find the domain name of your choice, you want to click on the "add" button which is represented as a plus symbol to add your domain name to cart. Do ensure to note the different prices for the different domain extensions and costs for renewal.
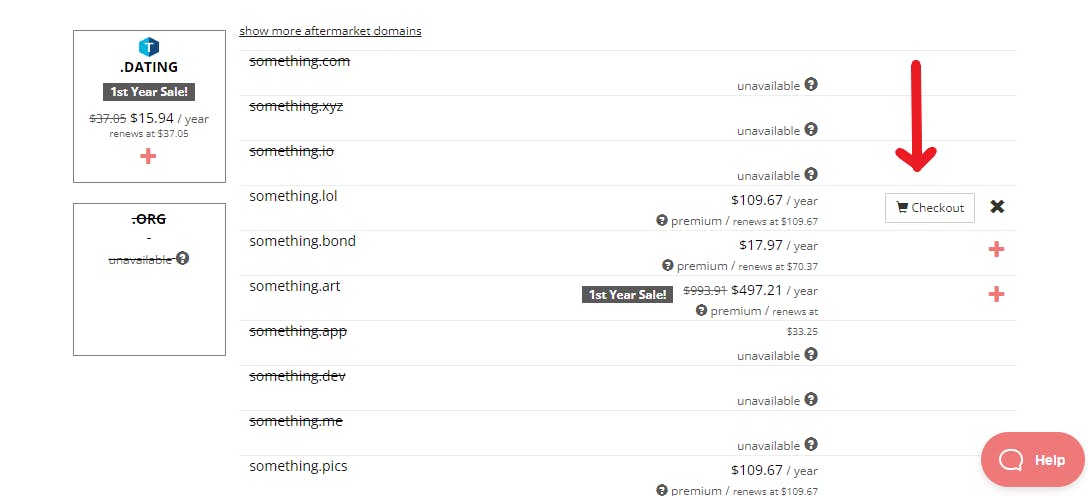
Step 4 - As soon as you click on the add to cart button, a checkout button will instantly appear. Click on the checkout button to go to checkout.
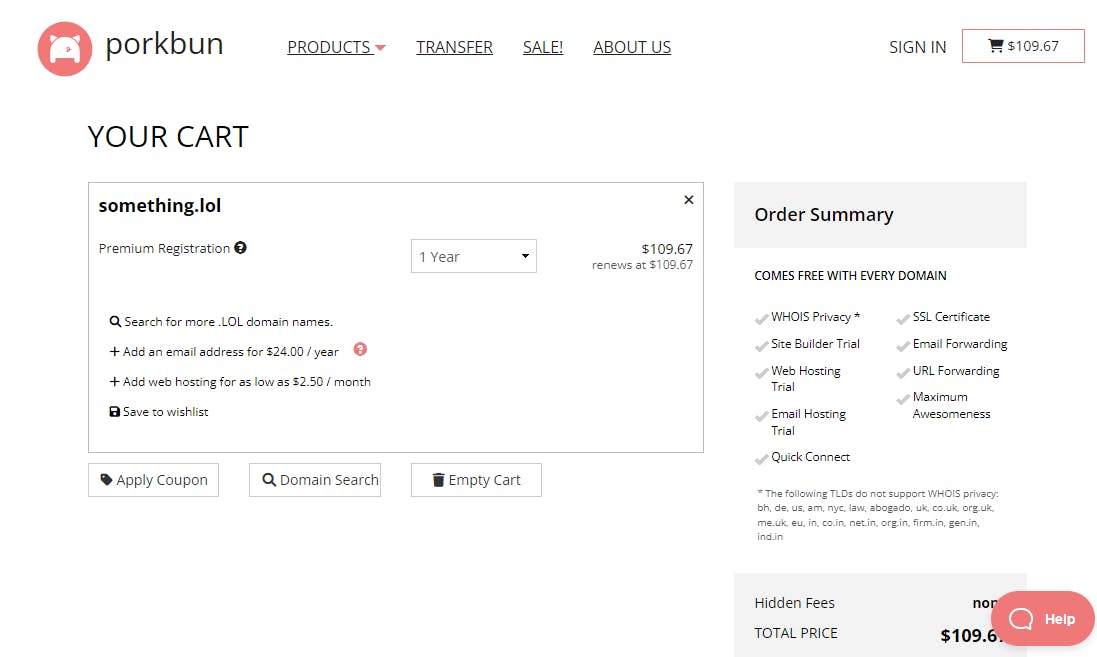
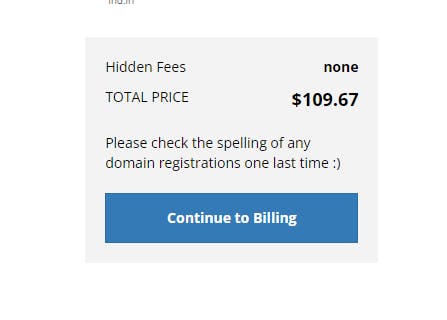
Step 5 - Your cart page will appear when you click on the checkout button, you want to go ahead and click on the continue to billing button to proceed with the purchase of your domain name. You want to confirm that everything is to your liking before clicking the button of course.
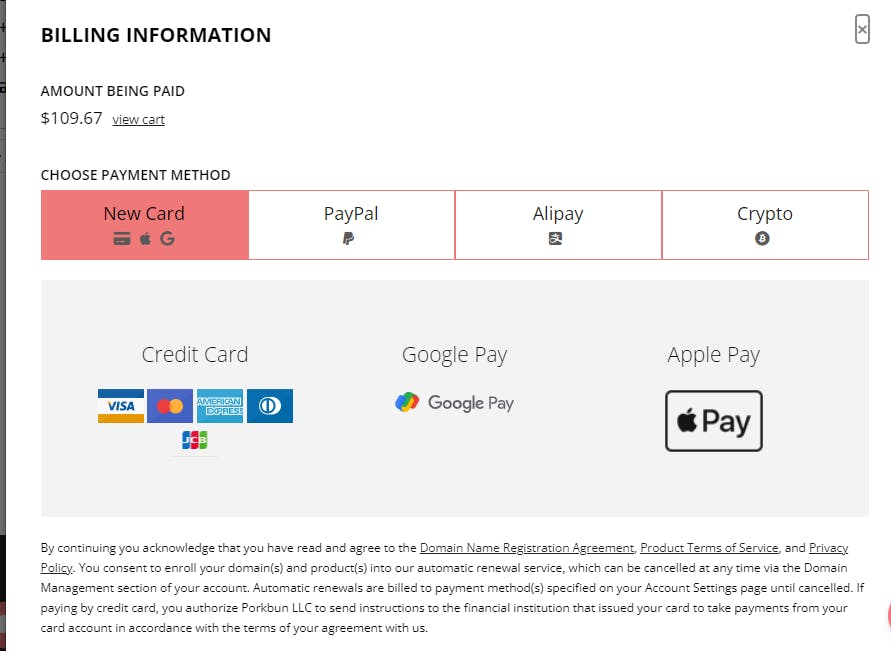
Step 6 - A "billing information" modal will pop up after you've clicked on the "continue to billing" button, select your means of payment, scroll to the bottom and click on the "I'm not a robot" captcha. Two buttons should appear, one for cancelling the process and another for continuing with the payment. If you wish to proceed, then click on the latter.
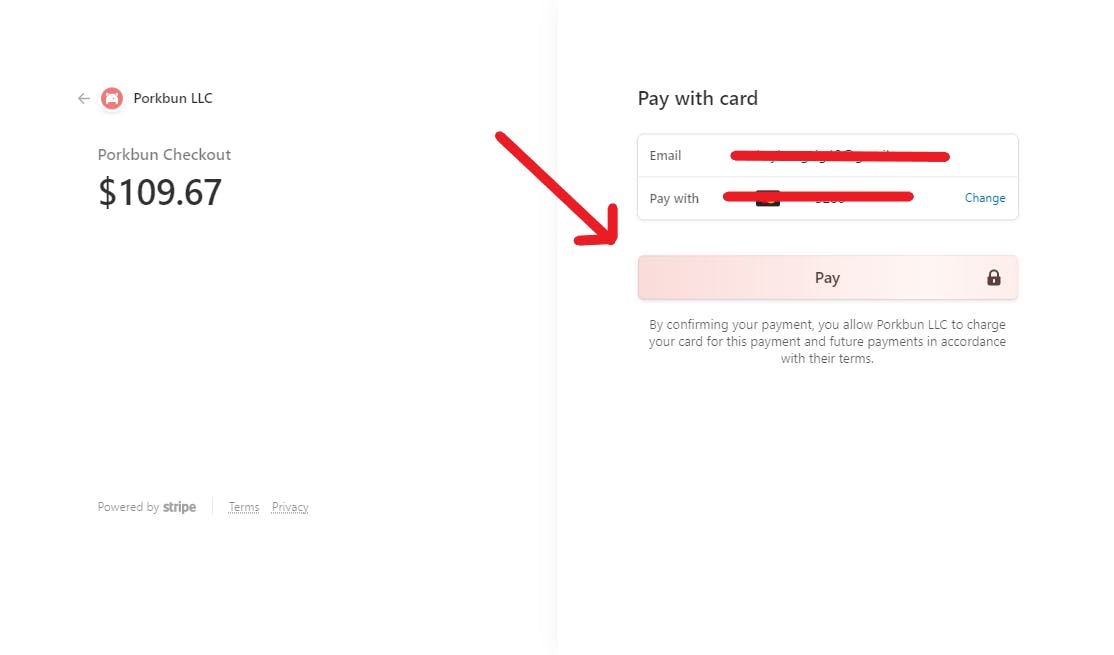
If you've entered your payment method details correctly(e.g: your credit card number, expiry date and cvv if you're using a credit card), then you should be directed to the final page where you can click on the "pay" button to finalize payment.
If your payment is successful, head back to the homepage, click on the "account" link and click on "domain management.
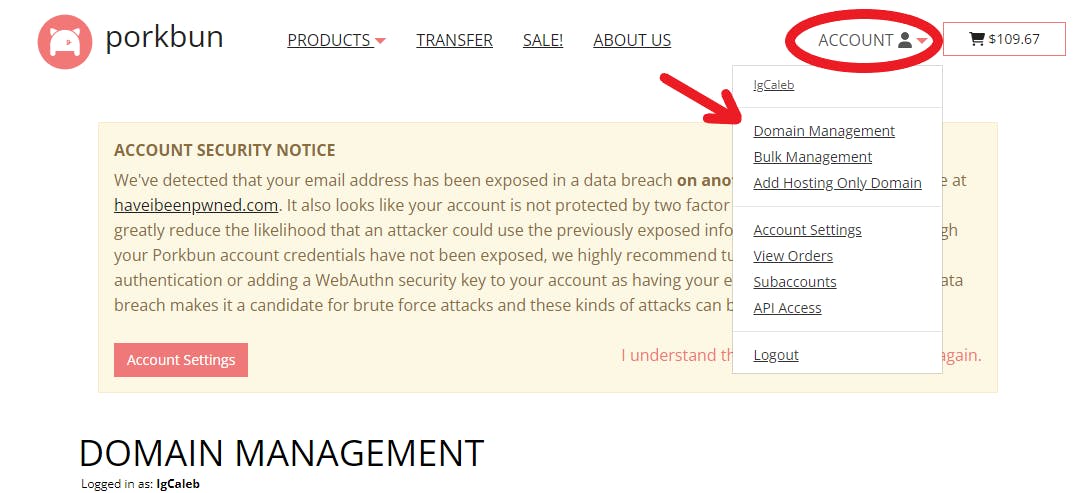
You should now see the domain name you've purchased.
Step 7 - Head to your Vercel app and click on the project you want to use the custom domain name for. In this example, I'll be using the blend app project I built a while back
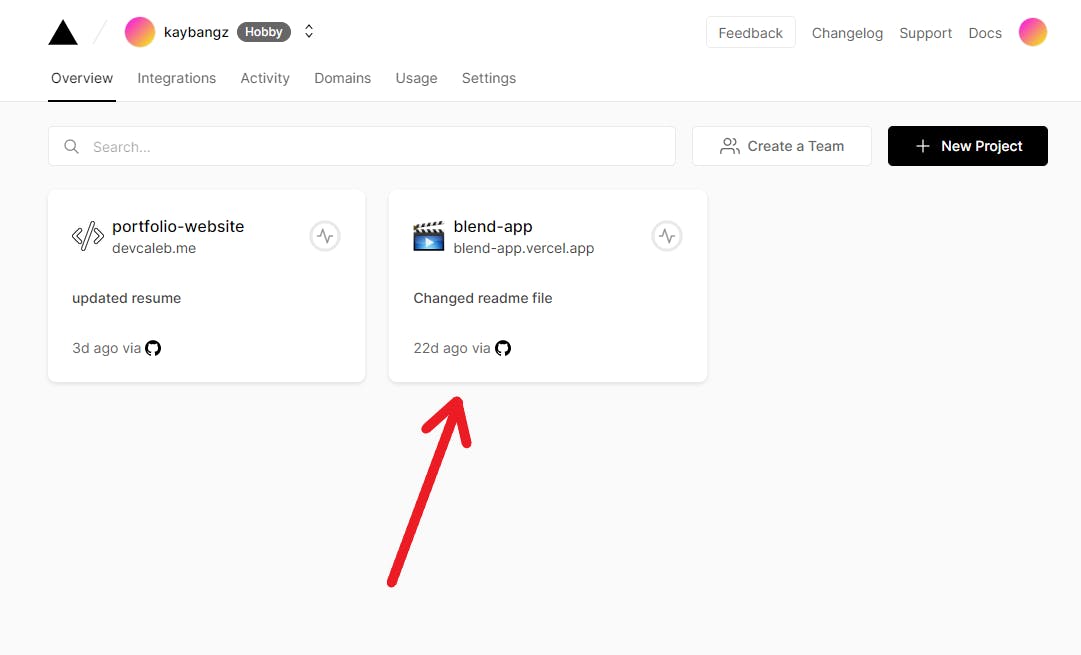
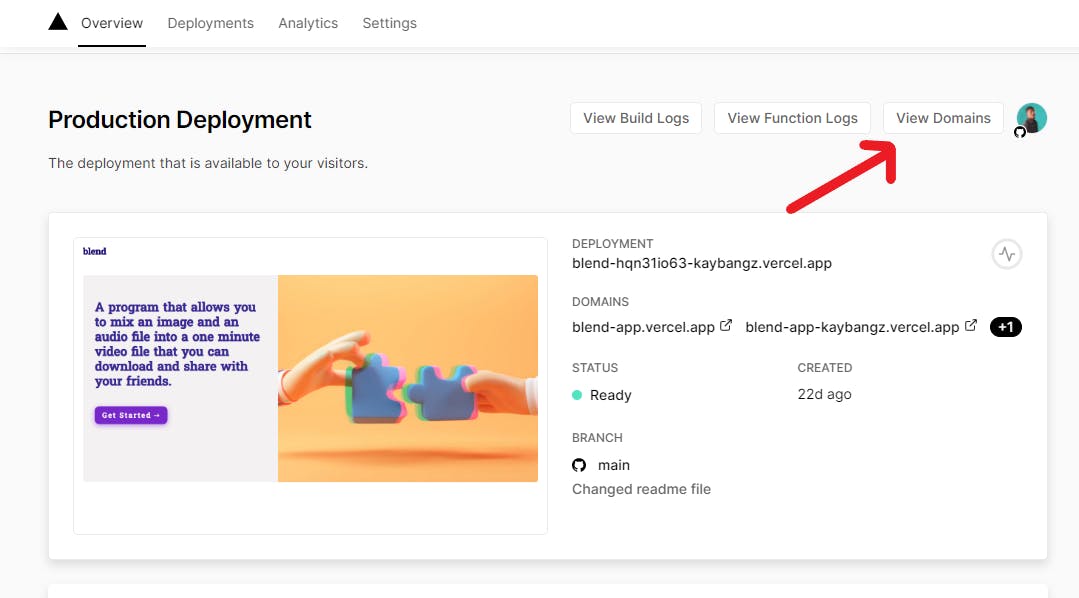
Click on the "view domains" button of the project.
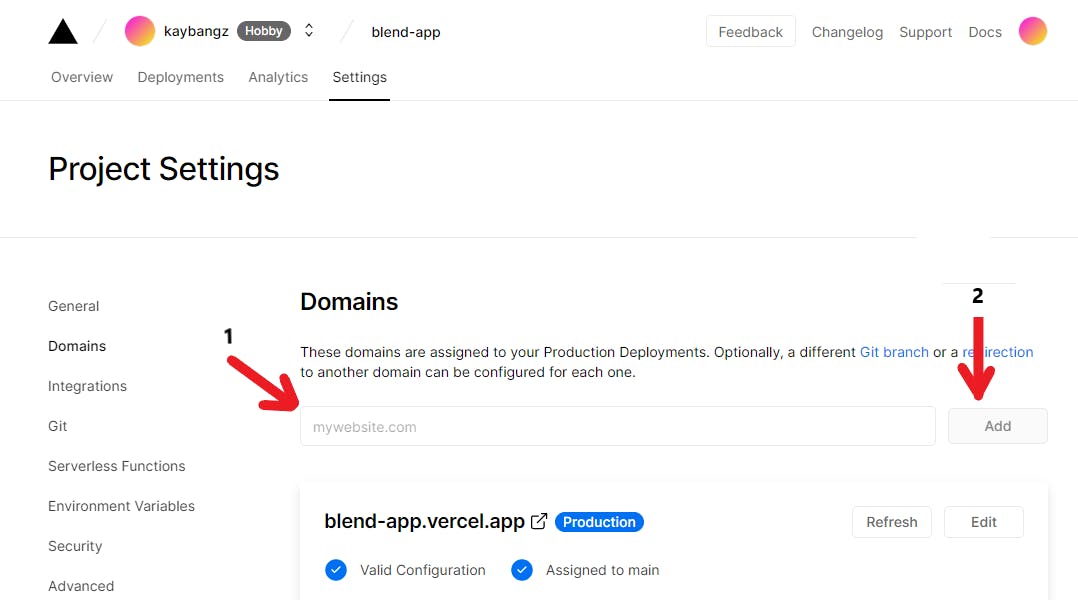
Proceed to enter the domain name you purchased from Porkbun in input box labeled 1 and click on the add button labeled 2
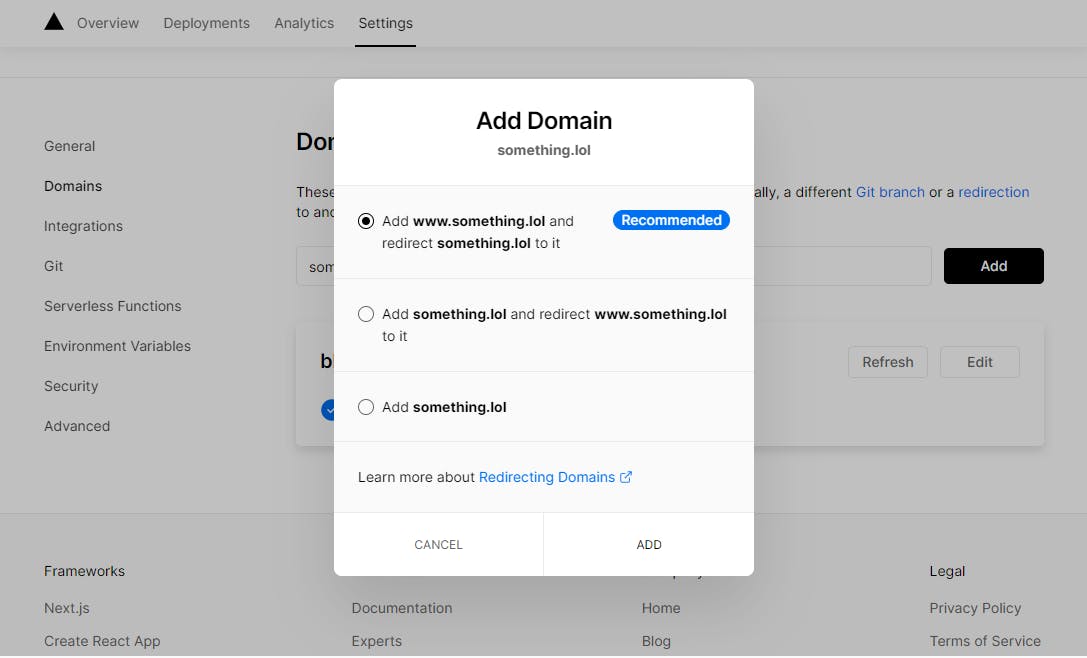
After clicking on the add button, you'll get the modal pop up shown below, choose the option you want and click on add.
Step 8 - Copy the IP address provided and head over to Porkbun
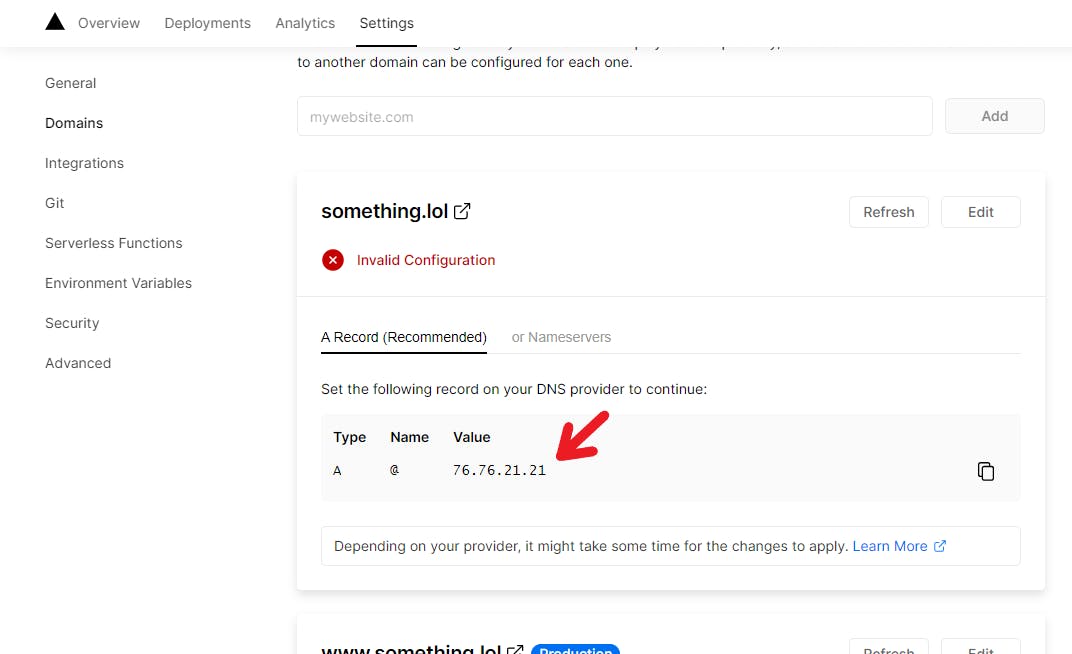
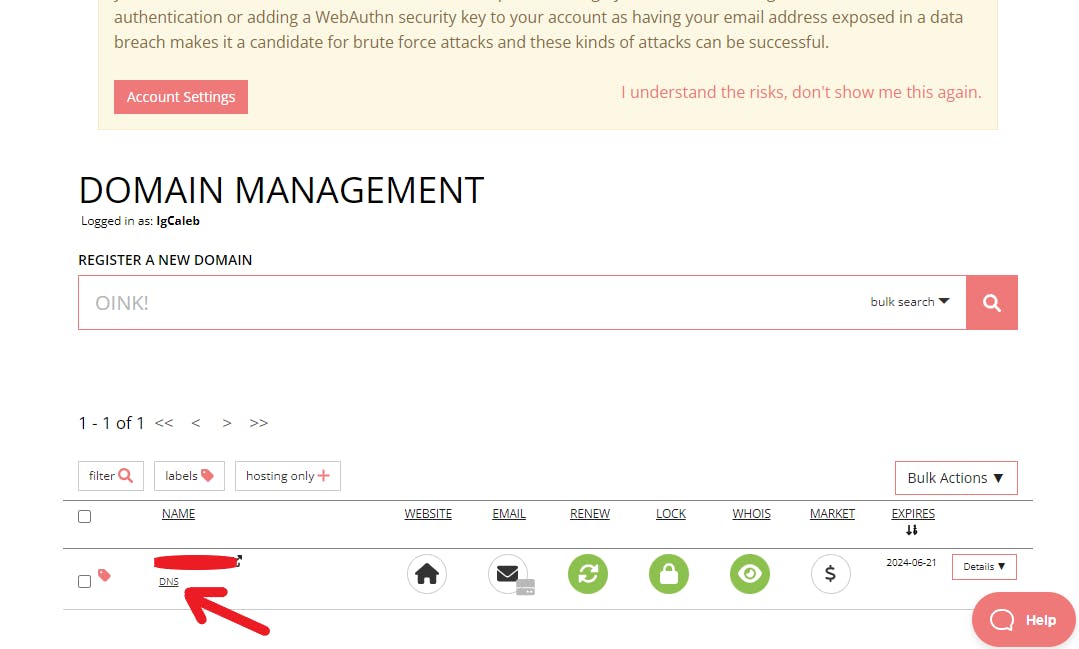
Once you're on Porkbun, click on the "dns" link directly below the domain you purchased
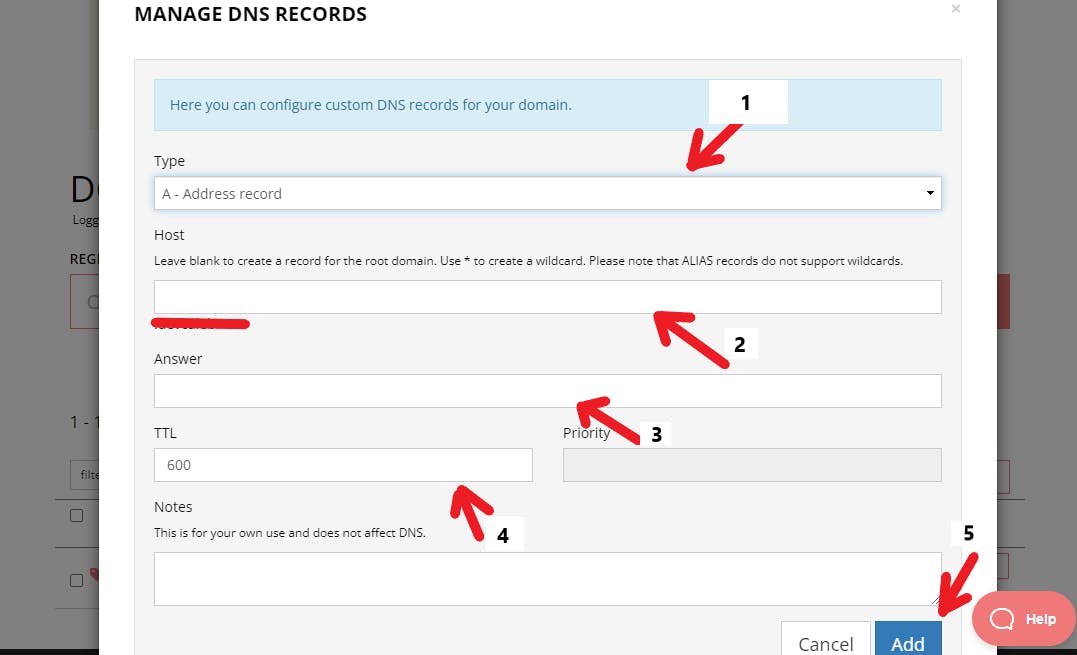
The "MANAGE DNS RECORDS" modal should appear, now this is where you need to pay close attention because this is a process you'll have to do twice, once with a host and the other without.
Step 9 - As soon as the modal appears, the "type" input field labeled as 1 should be "A- Address record", enter "www" in the "host" input field labeled as 2, enter the IP address you copied from Vercel(check step 8) into the "answer" input field labeled as 3, the "TTL" input field labeled as 4 should stay the same, then proceed to click on the add button labeled 5. Repeat this process again, but this time, do not put anything in the "host" input field labeled as 2, and click on add again.
Scroll to the bottom and check if both information were successfully added to the current records table.
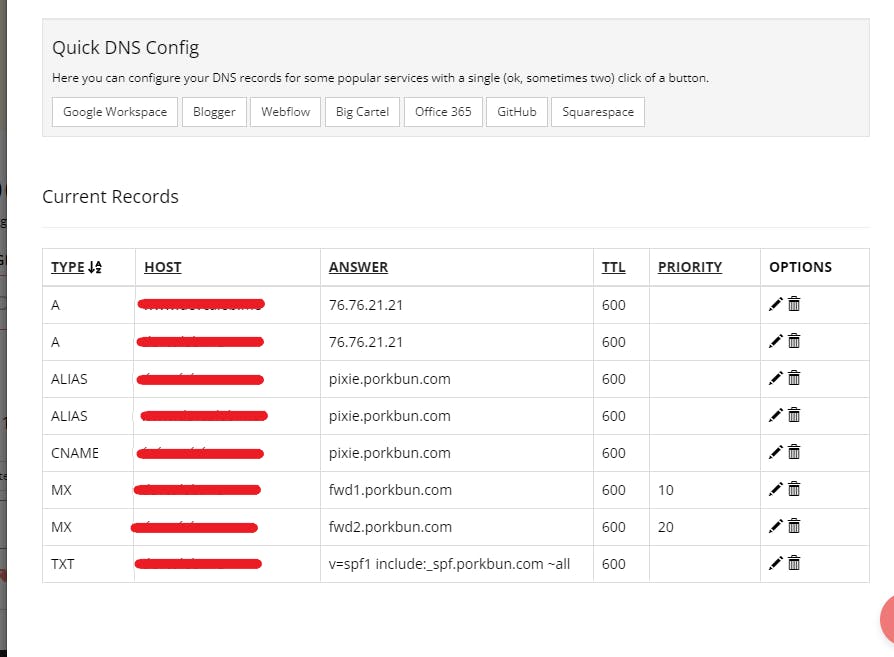
It might take a while, but you can now visit the domain to see your project.